Teamspeak: Difference between revisions
No edit summary |
|||
| (38 intermediate revisions by the same user not shown) | |||
| Line 1: | Line 1: | ||
[[ | [[File:teamspeak.png|right|]] | ||
'''Teamspeak''' | |||
TeamSpeak | TeamSpeak voice conference is a properietary software which allows users to communicat over the Internet or a LAN. Teamspeak is optimized for use in online games, it has a low processor utiliziation and low data transfer rates<br> | ||
The Teamspeak protocol is not specified open Teamspeak is incompatible with al other protocols, Particular, it providers no support for open IP telephony protocols such as SIP, H.323 oder IAX.<br> | |||
<div class="clear"></div> | |||
<div class="proditem ven">[[Webinterface]]</div> | |||
<div class="clear"></div> | |||
<!-- | |||
{| class="wikitable center" | |||
|- | |||
! [[Mumble]] !! [[Ventrilo]] !! [[Webinterface]] | |||
|} | |||
--> | |||
== | == Versions / Client / Download == | ||
Windows 32 Bit Version 3. | Windows 32 Bit Version 3.6.x [http://www.teamspeak.com/?page=downloads Download] | ||
Windows 64 Bit Version 3. | Windows 64 Bit Version 3.6.x [http://www.teamspeak.com/?page=downloads Download] | ||
MAC Version 3. | MAC Version 3.6.x [http://www.teamspeak.com/?page=downloads Download] | ||
== Teamspeak | == Features == | ||
=== Password Set and Password Change === | |||
You can change the server password for your TS3 server in the panel and then click on save to make this change active. | |||
[[File:Teamspeak-change-pw.png|alt=Set Teamspeak Password or change it|750x750px]] | |||
=== TSDNS Subdomain === | |||
You can create a suffix for your Teamspeak server free of charge at CKRAS, e.g. '''yourclan.ckras.eu.''' | |||
[[File:Tsdns-teamspeak.png|alt=TSDN Teamspeak Adress|750x750px]] | |||
==== Use your own top Level domain ==== | |||
You can point your own top-level domain to our Teamspeak servers. We will show you how to do this in the next steps. | |||
Please enter the following settings here with your web hosting provider or have them entered if possible. | |||
<code>_ts3._udp.yourdomain.com. 400 IN SRV 0 5 11405 teamspeak.ckras.com.</code> | |||
<u>The following description only applies if you have a web hosting package from CKRAS with your own top-level domain!</u> | |||
# log in to the webspace panel <nowiki>https://lc.ckras.com</nowiki>. | |||
# click on ‘Domains’ in the menu on the left under ‘Hosting’ | |||
# now click on the ‘+ New subdomain...’ button at the top of the main window | |||
# in the ‘New subdomain’ overlay window that is now open, enter the following under Subdomain at the top left (without the ‘’ characters): ‘_ts3._udp.’ | |||
# now select the desired domain to the right of it, if several are available | |||
# remove the tick next to ‘Activate webspace’ | |||
# click on the ‘Own DNS entries’ button | |||
# now select the value ‘SRV’ in the drop-down menu and click on add | |||
# now enter the TTL (Time to live) to the right of the SRV field. We recommend ‘400’ | |||
# next, set the ‘Priority’ value to ‘0’ | |||
# then set the value ‘Weight’ to ‘5’ | |||
# set ‘Port’ to ‘e.g. 10000, see [[webinterface]] for your exact port’ | |||
# keep ‘server name’ as ‘teamspeak.ckras.com’ (Attention: Do not enter your domain name here) | |||
# now press ‘save’ | |||
# From now on you can reach the TS with your own domain, e.g. yourdomain.com | |||
=== Export Teamspeak Settings === | |||
You can find the item ‘EXPORT’ at the top of the webinterface next to the online status, just click here and you can export your TS data, but note that no avatars or uploaded pictures are exported here. | |||
[[File:Ts-export-settings.png|alt=Teamspeak Export|716x716px]] | |||
You can backup your TS Settings by clicking "EXPORT" | |||
=== Snapshots (Backup/Restore) === | |||
'''Snapshot (backup/restore function)''' for your Teamspeak is a ''free'' backup, restore service from CKRAS, which always resets your server to the point in time at which the snapshot was created. By default, we always create backups for the last 3 days so that you always have access to a backup of the channel settings etc. | |||
As mentioned, this service is included free of charge for all Teamspeak servers. | |||
[[File:Snapshot-teamspeak.png|alt=Snapshot Teamspeak|750x750px]] | |||
Snapshots | |||
A snapshot deploys the state of the ts3 server as dated. The server will restart with the snapshot version immediately! The snapshot contains: | |||
All server and channel groups including their permissions | |||
All the channels on the server including any permissions assigned to them. | |||
Channel descriptions, topic, password etc. | |||
All clients that are present in the database for this virtual server including possibly assigned permissions. | |||
Server settings (server name, slots, banner etc.) | |||
Things that are not included: | |||
Any Icons | |||
Any Avatars | |||
Any files that have been uploaded | |||
== TOKEN == | |||
You can easily create new tokens for various groups that you have created in the [https://iface.ckras.com webpanel]. In our example picture you can see an unused token and next to it the icon ‘Copy’ with which you can put the token into your clipboard to authorise yourself on the Teamspeak server. The unused token will disappear after use on this page and you can then create further new authorisation keys with ‘Add Token’.<br> | |||
[[File:Teamspeak-token.png|alt=Teamspeak Token Management|750x750px]] | |||
== Query Port == | |||
You need the Teamspeak query port, here you can find the port in the [[webinterface]]. | |||
[[File:Teamspeak-query-port.png|alt=Teamspeak Query Port|750x750px]] | |||
== Teamspeak Surfaces Statement == | |||
=== | === Installation screen === | ||
[[ | [[file:teamspeak_1.png]] | ||
=== | === Licence Terms === | ||
[[File:teamspeak_2.png]] | |||
=== Installation=== | |||
[[file:teamspeak_3.png]] | |||
=== Recommended Settings === | |||
[[file:teamspeak_4.png]] | |||
=== Server Setup === | |||
[[file:teamspeak_5.png]] | |||
=== Add Server === | |||
[[file:teamspeak_6.png]] | |||
=== Virtual Server edit === | |||
[[file:teamspeak_7.png]] | |||
=== HAVE FUN === | |||
== Video Tutorial == | == Video Tutorial == | ||
<youtube>S32AGZdY5yA|</youtube> | |||
== Testserver == | |||
Testserver: teampeak.ckras.com:9987 | |||
== Teamspeak | == Teamspeak Rental == | ||
[http://www.ckras.com/ | [http://www.ckras.com/Voiceserver-mieten-Teamspeak-Ventrilo-Mumble Teamspeak Rental] | ||
[[Category:CS2]] | |||
Latest revision as of 16:24, 9 October 2024
Teamspeak
TeamSpeak voice conference is a properietary software which allows users to communicat over the Internet or a LAN. Teamspeak is optimized for use in online games, it has a low processor utiliziation and low data transfer rates
The Teamspeak protocol is not specified open Teamspeak is incompatible with al other protocols, Particular, it providers no support for open IP telephony protocols such as SIP, H.323 oder IAX.
Versions / Client / Download
Windows 32 Bit Version 3.6.x Download
Windows 64 Bit Version 3.6.x Download
MAC Version 3.6.x Download
Features
Password Set and Password Change
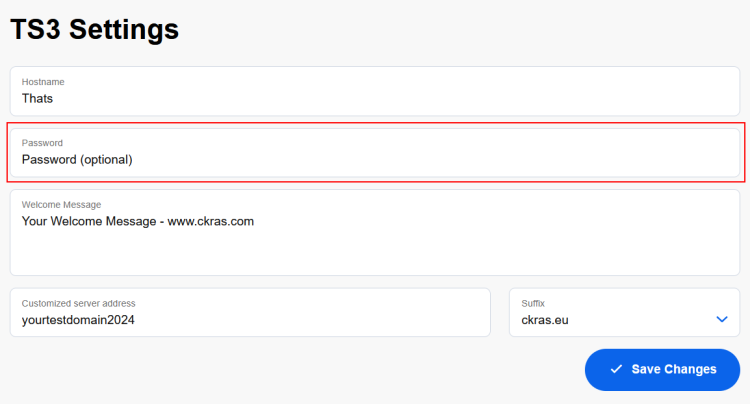
You can change the server password for your TS3 server in the panel and then click on save to make this change active.
TSDNS Subdomain
You can create a suffix for your Teamspeak server free of charge at CKRAS, e.g. yourclan.ckras.eu.
Use your own top Level domain
You can point your own top-level domain to our Teamspeak servers. We will show you how to do this in the next steps.
Please enter the following settings here with your web hosting provider or have them entered if possible.
_ts3._udp.yourdomain.com. 400 IN SRV 0 5 11405 teamspeak.ckras.com.
The following description only applies if you have a web hosting package from CKRAS with your own top-level domain!
- log in to the webspace panel https://lc.ckras.com.
- click on ‘Domains’ in the menu on the left under ‘Hosting’
- now click on the ‘+ New subdomain...’ button at the top of the main window
- in the ‘New subdomain’ overlay window that is now open, enter the following under Subdomain at the top left (without the ‘’ characters): ‘_ts3._udp.’
- now select the desired domain to the right of it, if several are available
- remove the tick next to ‘Activate webspace’
- click on the ‘Own DNS entries’ button
- now select the value ‘SRV’ in the drop-down menu and click on add
- now enter the TTL (Time to live) to the right of the SRV field. We recommend ‘400’
- next, set the ‘Priority’ value to ‘0’
- then set the value ‘Weight’ to ‘5’
- set ‘Port’ to ‘e.g. 10000, see webinterface for your exact port’
- keep ‘server name’ as ‘teamspeak.ckras.com’ (Attention: Do not enter your domain name here)
- now press ‘save’
- From now on you can reach the TS with your own domain, e.g. yourdomain.com
Export Teamspeak Settings
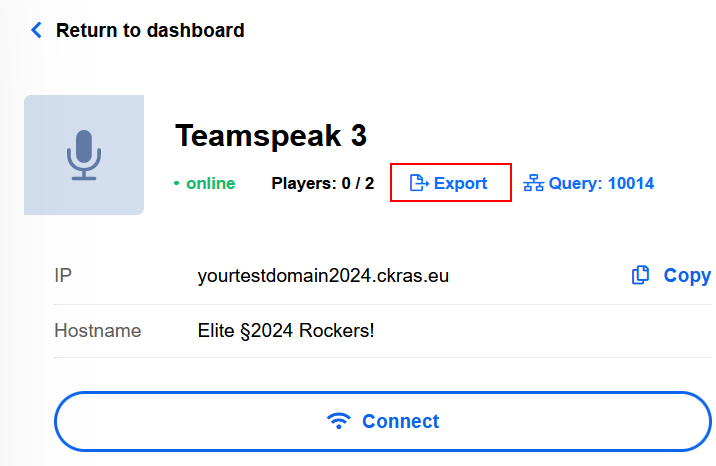
You can find the item ‘EXPORT’ at the top of the webinterface next to the online status, just click here and you can export your TS data, but note that no avatars or uploaded pictures are exported here.
You can backup your TS Settings by clicking "EXPORT"
Snapshots (Backup/Restore)
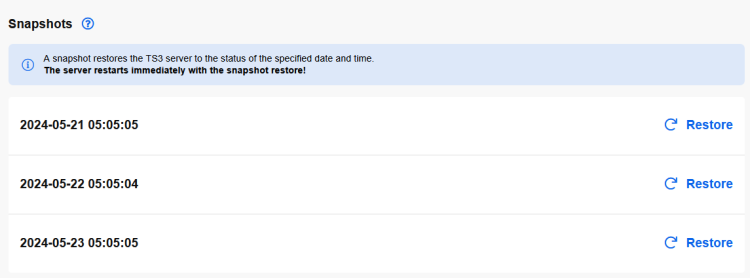
Snapshot (backup/restore function) for your Teamspeak is a free backup, restore service from CKRAS, which always resets your server to the point in time at which the snapshot was created. By default, we always create backups for the last 3 days so that you always have access to a backup of the channel settings etc.
As mentioned, this service is included free of charge for all Teamspeak servers.
Snapshots
A snapshot deploys the state of the ts3 server as dated. The server will restart with the snapshot version immediately! The snapshot contains:
   All server and channel groups including their permissions
   All the channels on the server including any permissions assigned to them.
   Channel descriptions, topic, password etc.
   All clients that are present in the database for this virtual server including possibly assigned permissions.
   Server settings (server name, slots, banner etc.)
Things that are not included:
   Any Icons
   Any Avatars
   Any files that have been uploaded
TOKEN
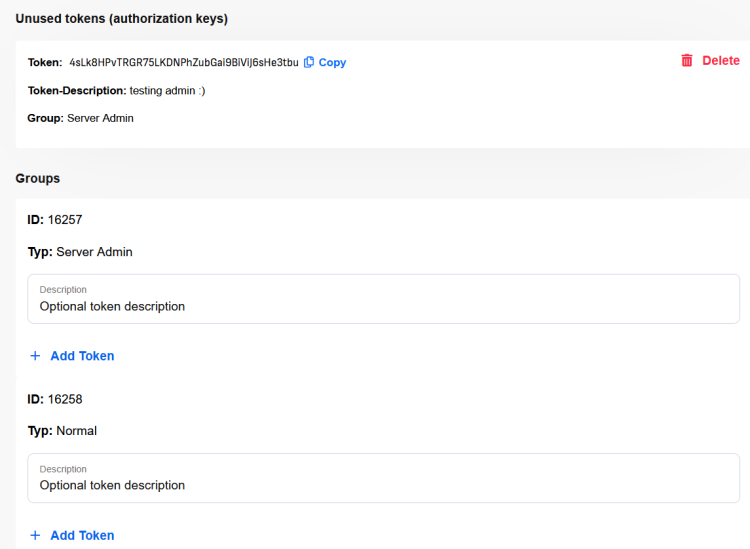
You can easily create new tokens for various groups that you have created in the webpanel. In our example picture you can see an unused token and next to it the icon ‘Copy’ with which you can put the token into your clipboard to authorise yourself on the Teamspeak server. The unused token will disappear after use on this page and you can then create further new authorisation keys with ‘Add Token’.
Query Port
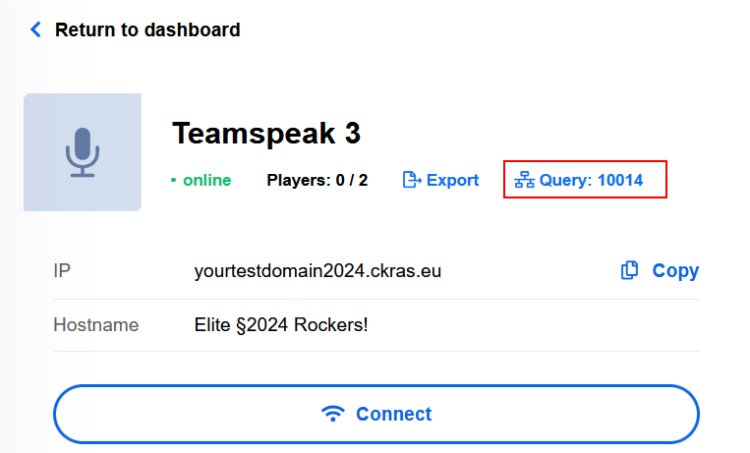
You need the Teamspeak query port, here you can find the port in the webinterface.
Teamspeak Surfaces Statement
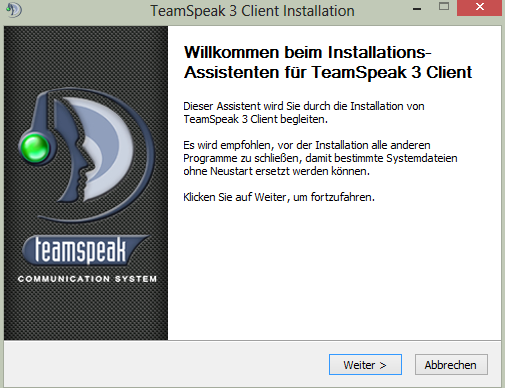
Installation screen
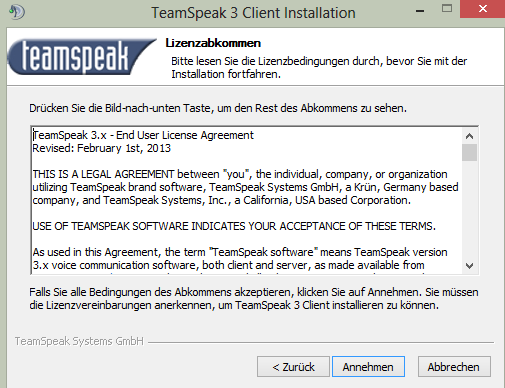
Licence Terms
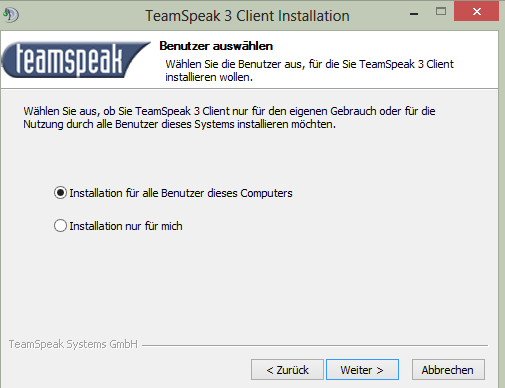
Installation
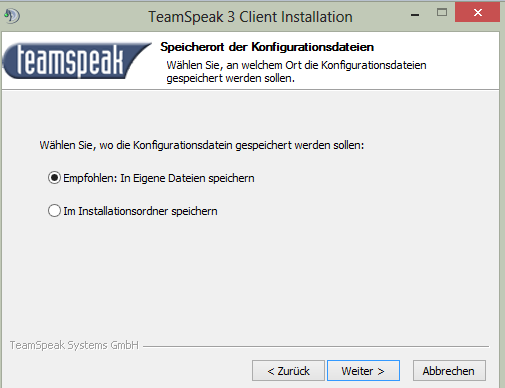
Recommended Settings
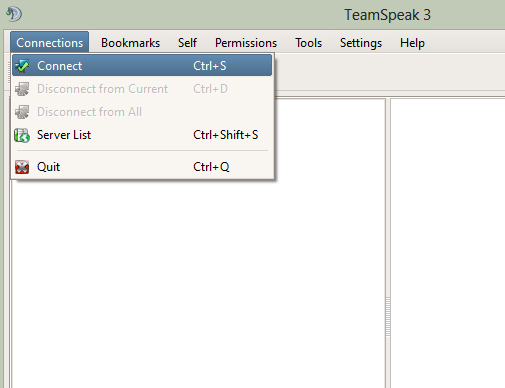
Server Setup
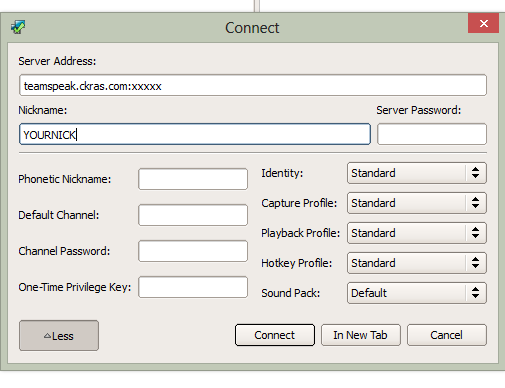
Add Server
Virtual Server edit
HAVE FUN
Video Tutorial
<youtube>S32AGZdY5yA|</youtube>
Testserver
Testserver: teampeak.ckras.com:9987
Teamspeak Rental
Teamspeak Rental

